Magnet quality testing in production line

To judge the quality of a magnet, we must talk about the force exerted by the magnet on a charged particle. The force vector field tells us the magnitude and direction of a force on a small test particle at any point. Therefore, the magnetic field is an image that we use to describe and visualize how the magnetic force is distributed around and within a magnetic object.

Unfortunately, we cannot see the magnetic field with the naked eye.

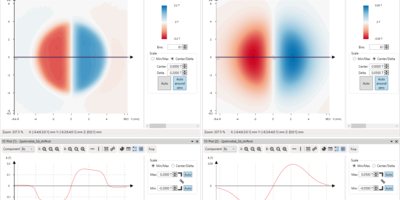
A magnetic field measurement system visualizes the field for us and enables analysis of the magnetic field distributions to test the magnet quality.

Magcam’s magnetic field measurement systems engineered for magnet testing on the production line include:
- MiniCube 3D, magnetic field camera
- MiniTable measurement platform
- Portal Scanner, magnetic field scanner
- MagScope, a powerful measurement and analysis software

Integrate magnetic field measurement systems into your production line

The important thing for leadership to understand is that integrating magnetic field measurement systems in the production line to test magnet quality is a smart ROI decision. Magnetic field measurement systems are crucial for every magnet-related manufacturer, OEM, or producer to avoid risks such as product recalls.

In the automotive industry, recalls have increased in frequency and intensity. Worldwide auto manufacturers spend more than $40 billion on yearly warranty expenses. 

Defective products not only jeopardize the customer's safety but also pose severe financial risks to the company in the case of a product recall. Regardless of the severity of a defective product, the financial repercussions include direct and indirect costs. For instance:

  • Direct costs: repairs and legal costs. Large-scale recalls affecting a large number of products can result in significant total expenses. Legal costs can include liability and class action lawsuits.

  • Indirect costs: These costs can be related to financial consequences such as loss in sales due to a damaged brand image or a reduced stock price. Furthermore, significant efforts can be expended to communicate recall information and to improve the company’s image. Customer services during recalls use up resources as well.

Therefore, it is essential to understand the main root causes behind the related quality problems and their implications for the company's quality management methods. An integrated magnetic field measurement system in the production line is the right solution to test magnet quality to ensure the quality of the end products.    

Choose the most suitable method for magnet testing in your production line

There are several ways to measure the magnetic field distributions, but the right approach will elevate the production yields, reduce scrap, and increase cost-effectiveness.

There are three factors to determine which testing setup is the best suited.

  • The size and shape of your permanent magnets
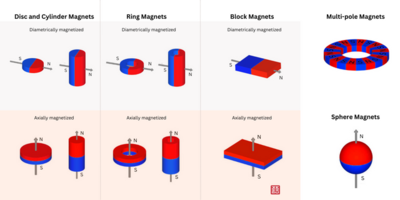
    The size of the magnet will determine if the magnets can be tested with one or multiple measurements. The shape of the magnet will decide which measurement mode is suitable to measure the magnetic field of the entire magnet’s surface.

  • The magnet quantity and desired throughput
    How many magnets need to be measured?
    What is the desired target of magnet unit per hour (UPH)?
    The number of magnets and the target of units per hour are essential to selecting suitable testing systems. Manual testing can be done if the goal is to measure 1000 magnets. Yet, if millions of magnets need to be tested with limited available time per unit, a fully automated production line becomes necessary.     

  • The type of magnet measurement to be performed
    Some high-end applications require measurements with high accuracy. In addition to magnetic field measurement, laser scanning is recommended to measure the magnets more accurately. The laser distance sensor allows measuring the precise position and the dimension of magnet or magnetic assemblies before operating the magnetic field measurement process.

magcam minicube 3D magnetic field camera

Method 1: Manual testing of magnets, one by one

For relatively small quantities and small magnets (<12.7x12.7mm²). The operator can manually place these magnets on a Magcam’s MiniTable measurement platform with an integrated magnetic field camera.

These small magnets can be tested in a single quick measurement. Most of the time will be consumed picking and placing the magnets in the corner of the positioning frame (to ensure consistent results) and placing them after the measurement in the good or lousy magnet’s container (Pass/fail). This can take between 10 and 30 seconds, depending on how easy it is to handle the magnets.

Magcam’s magnetic field camera has a Hall sensor area of 12.7x12.7mm². For larger magnets, let’s say 6x20mm², testing can be done with the Magcam Portal Scanner.

The number of magnets and the type of magnet measurement can affect both the measurement and processing times. For most of the tests, a single side measurement is enough. In case of crack detection, both sides need to be measured. A single measurement takes about 800 microseconds. The analysis and pass/fail decision time typically takes only a few milliseconds.

For more advanced analyses, like a MagFit analysis in MagScope software, the measurement can take a few seconds. Most tasks can be performed in parallel, especially with multiple magnetic field cameras. A measurement on magnet A can be done in parallel with moving magnet B, in parallel with processing magnet C, etc.

Measuring magnetic fields of magnets in a tray

Method 2: Manual batch testing

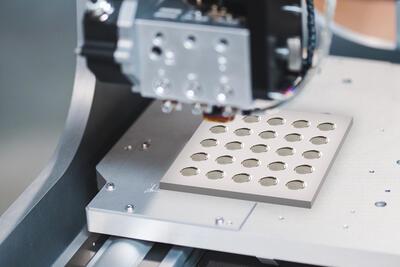
When you need to test up to hundreds of thousands of magnets per year, the best solution is to use a magnet tray on the Portal Scanner.

The operator can place the magnets in a tray and test these magnets as a set with the Portal Scanner. MagScope software can be programmed to test the whole batch, one magnet at a time. The measurement results can be saved in one file (for the set) or separate files (per magnet) with the pass/fail results linked to the location/index on the tray.

A pass/fail script can be applied to screen out the magnets that do not meet the requirements. The set-up time gets reduced significantly compared to testing one magnet at a time. The units per hour ( UPH) can vary considerably depending on the size of the magnets. Small magnets (e.g., 8x8mm²) take one measurement, while larger magnets (e.g., 20x20mm²) take four measurements. To increase the accuracy of the measurement, Magcam’s laser distance sensor is needed to compensate for any variations in the magnet heights and tray height differences.


Method 3: Automated magnet testing magnet per magnet with industrial robots

Magcam’s magnetic field cameras can be integrated into a 100% in-line production system. There are two ways of doing this:

The magnetic field camera can be static while the magnets are moved onto the camera, or the magnetic field camera can be moved towards the magnet with an industrial robot. When static, the camera faces upwards, and the magnets are placed on the camera by a pick-and-place robot. Most magnet specifications can be determined quickly with a single measurement. If both sides of the magnet need to be measured (for instance, to check for micro-cracks), the robot can either flip the magnet on the same camera or the magnet can be flipped onto a second camera. When working with two cameras, the UPH can be doubled.

The same is true when the magnet is larger than the camera, and the robot will have to move the magnet once or twice to make the appropriate measurements to cover the whole magnet area. A single measurement takes about 800 microseconds, while the processing time of the software takes between 1 and 3 seconds. Pick & place movements take 1 to 2 seconds. When the camera is mounted onto a robot arm, the camera can be used to move around to make multiple measurements. For instance, the camera can be placed above the south side of the magnet in position A, take a measurement, and then move to position B to measure the north side of another magnet.

The table below gives an overview of magnet volume testing that can be achieved using different methods.

Magcam experts can assist in making the best decision for your situation.  We are happy to provide you with the best possible measurement solutions. 

Magcam uses cookies

This website uses cookies to improve your user experience. We process cookies for (1) electronic communication and display of the website, (2) further design, (3) measurement and analysis of your usage, (4) display of tailored content and advertisements and (5) third-party purposes (if applicable). You can choose to accept or refuse the use of cookies (with the exception of essential cookies) for each category. Refusing certain categories of cookies (e.g. functional cookies or marketing cookies) may impact your user experience or prevent us from further improving that user experience. The 'Preferences' button allows you to set or change your preferences now or later.

More information on cookie processing can be found in our privacy policy.

Essential cookies

Always on

Functional cookies

Always on

Analytical cookies
Marketing cookies
Third-party cookies

Always on